How to install our expert-advisors Lynx, OnTheRiver,ThirdBrainFx,Exotic,Sphynx,X113 and OnTheRiver. (Read last point for the Metarobot-ThirdBrainFx)
1 Step 1:
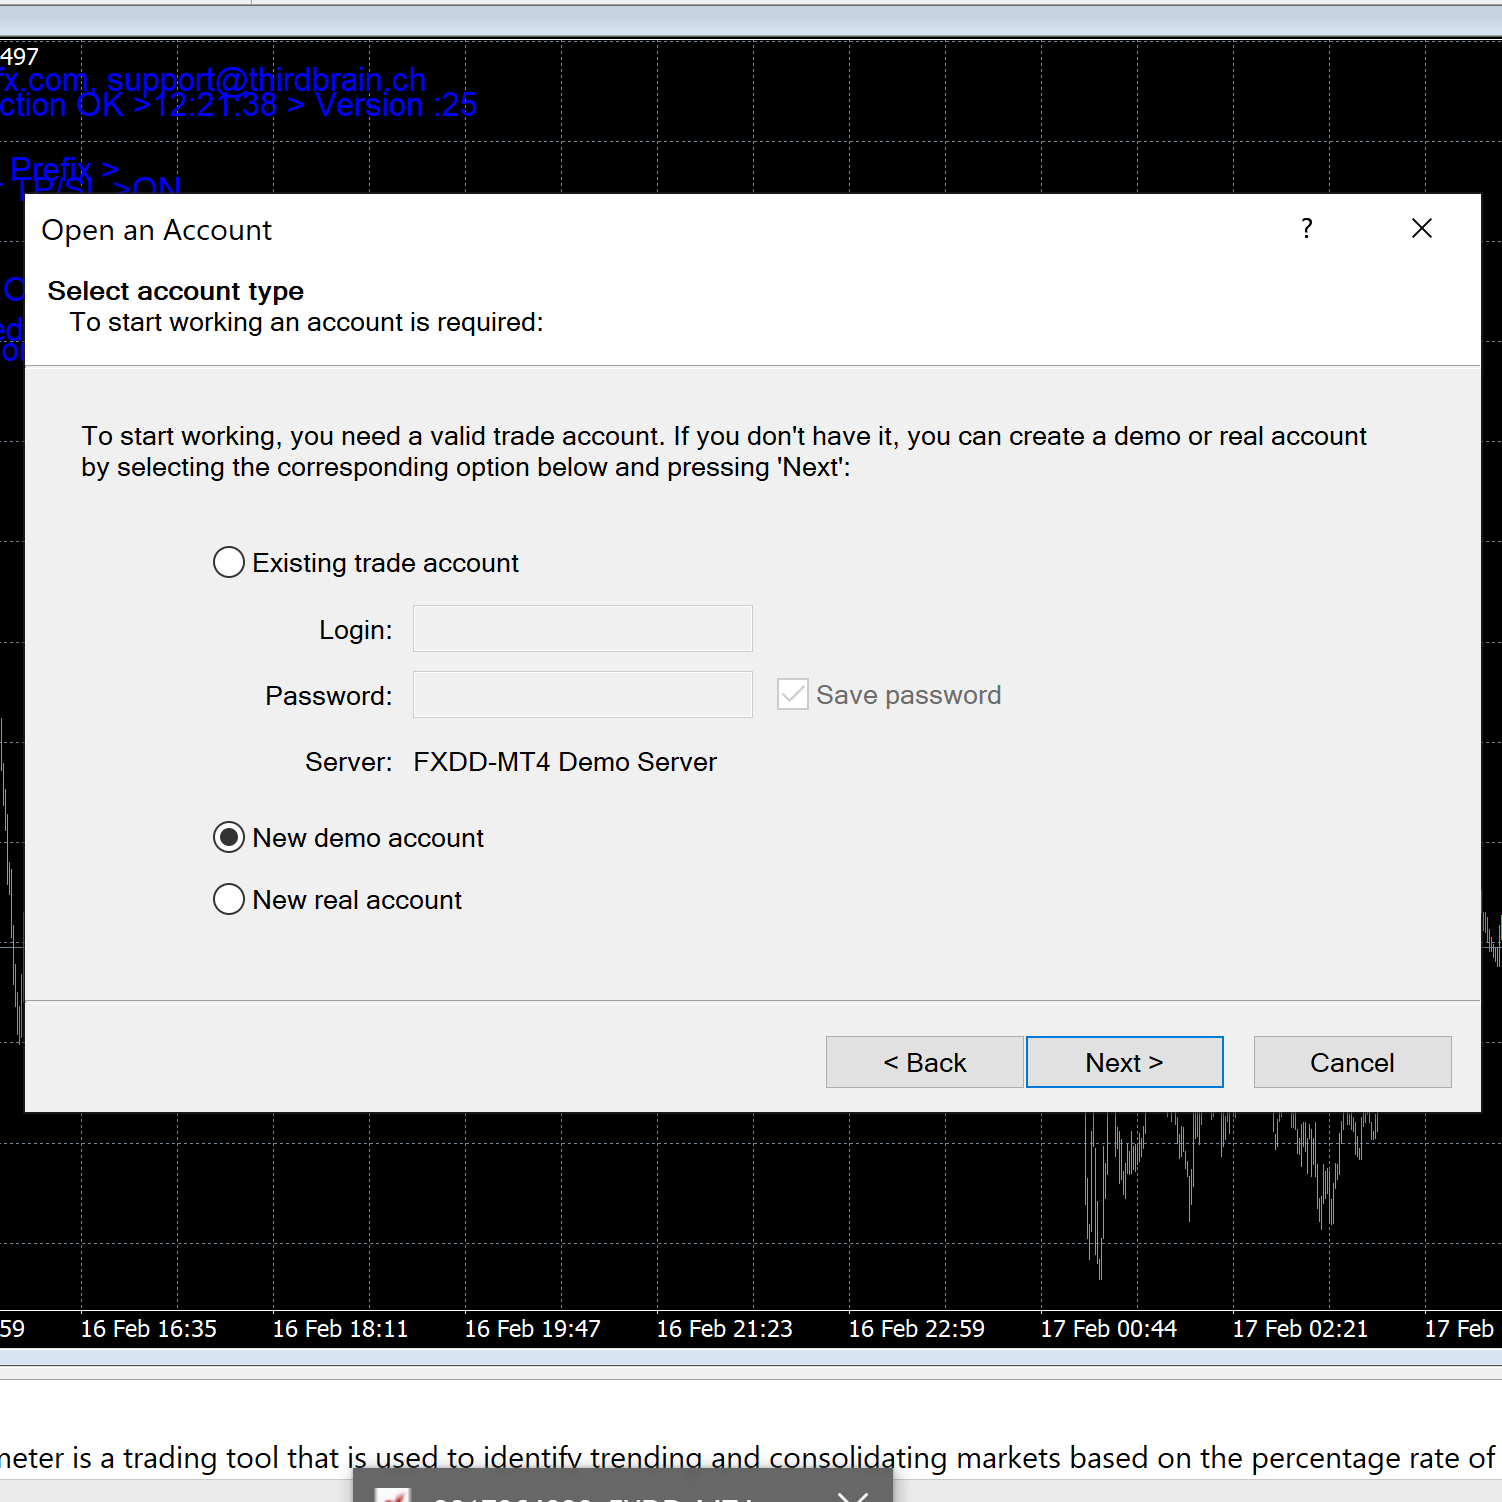
When you run the Mt4 program and you open it, you will see this pop-up box ’Open an Account’. If you are new to this, we suggest you set up a Demo Account and Demo Server, so you understand how it works.
2 Step 2:
After choosing Demo Server in our case, you choose ‘New demo account’-> ‘Next’
3 Step 3:
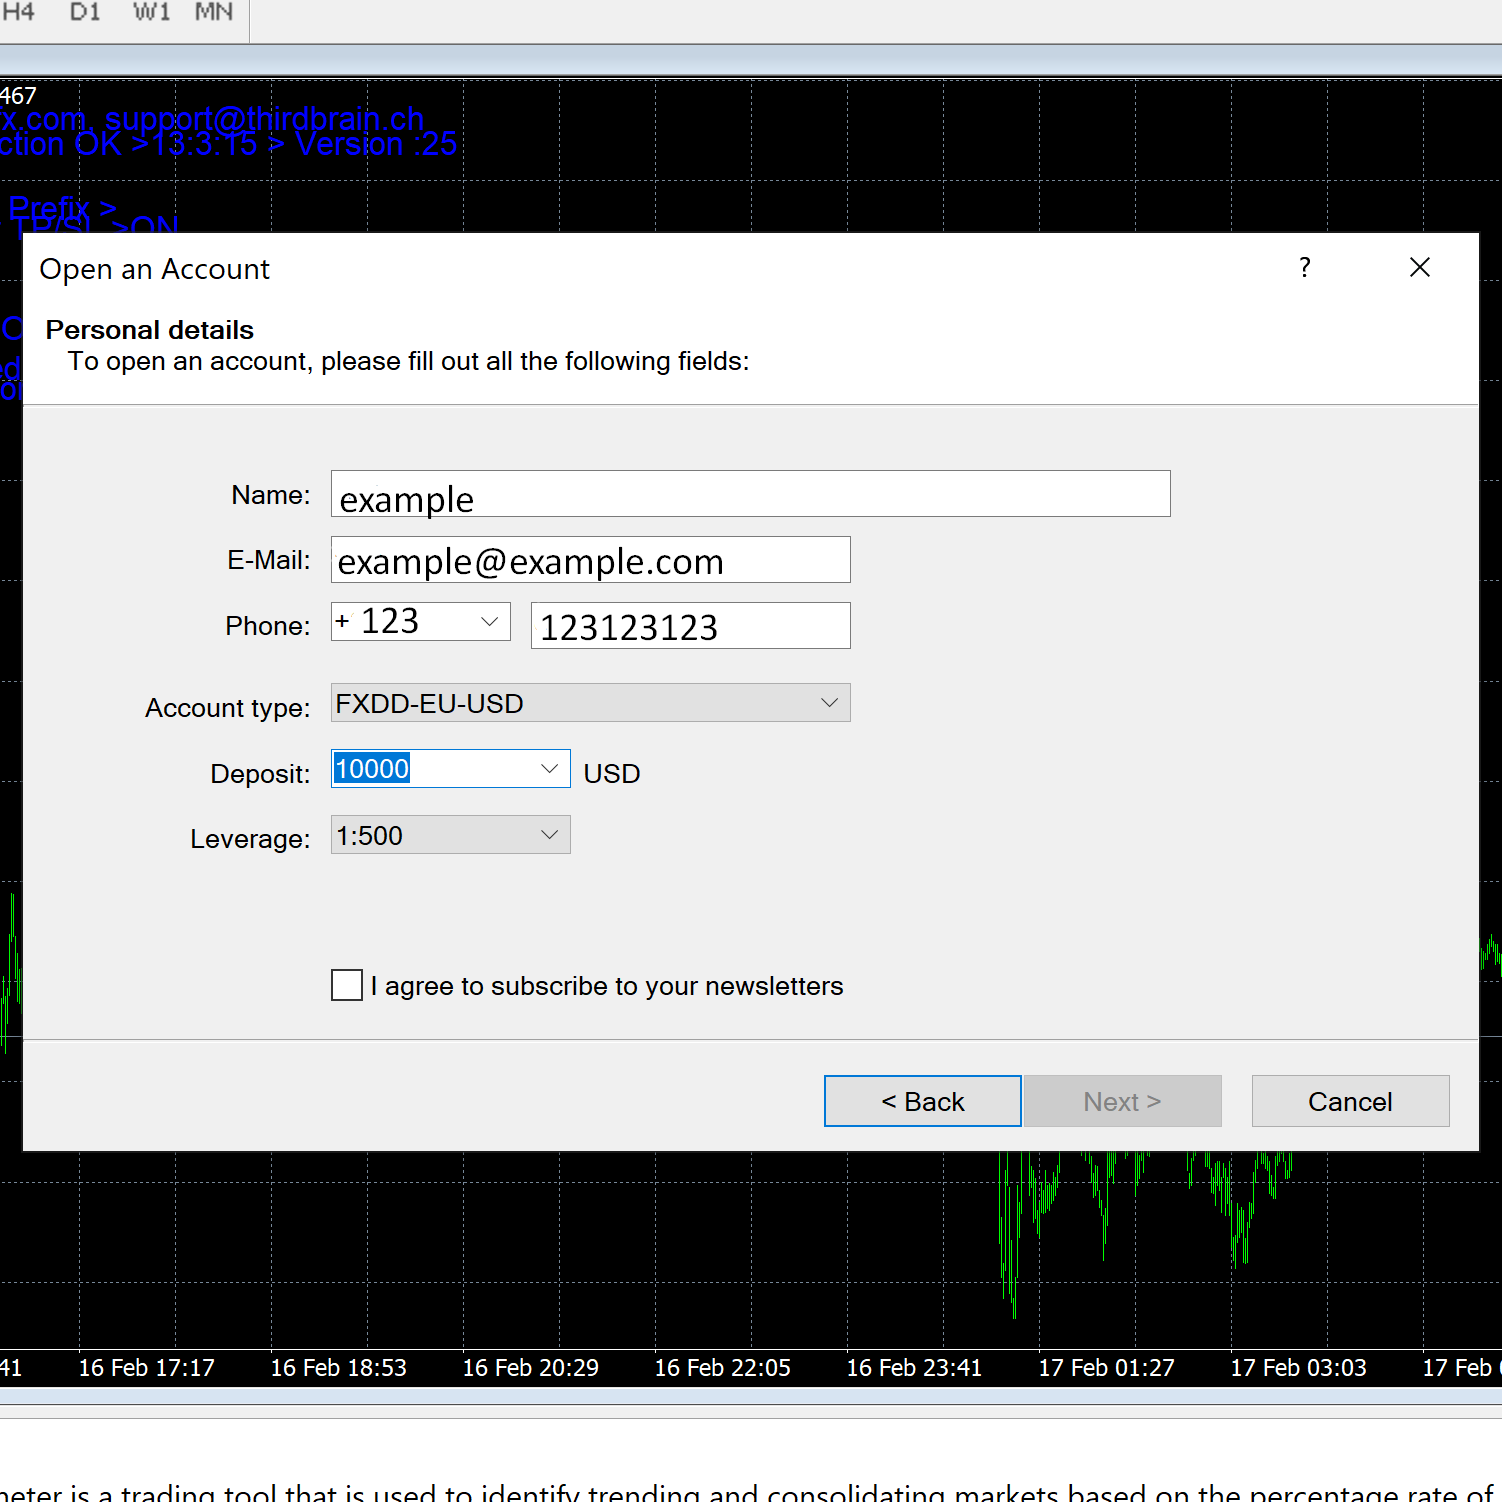
In the next step, insert your real personal name, personal email address, and your real phone number, so you get the messages from the program in your email box and you can follow how the expert advisor is running your trades. Click -> Next
For deposit: you could choose any amount as it is a Demo account.
Leverage (Leverage results from using borrowed capital as a funding source when investing to expand the firm’s asset base and generate returns on risk capital. ): you could choose any amount.
You must agree to subscribe to the newsletter.
Important! Save the password shown on your screen because that is your way to have access to your profile afterward.
4 Step 4:
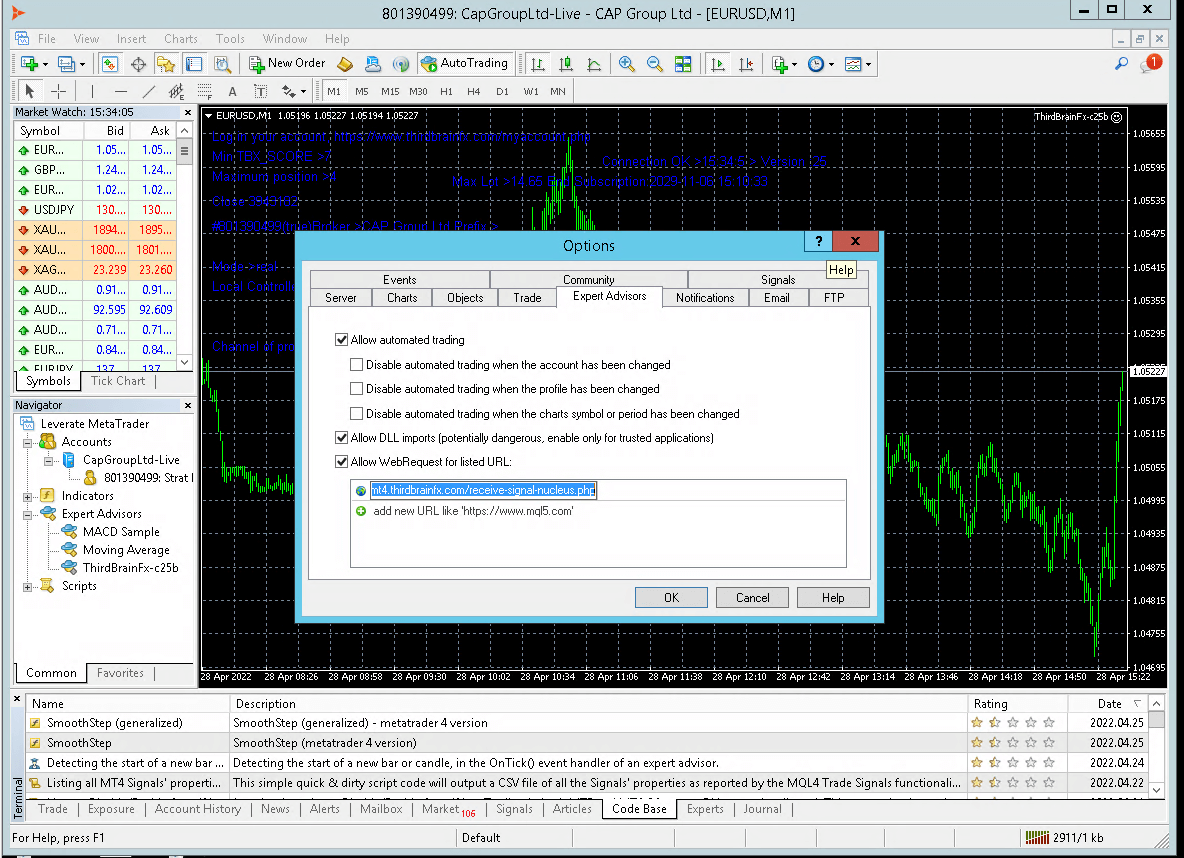
Go to Tools>Options, then choose ‘Expert-Advisors’. Check the boxes as shown in the picture.
At the bottom of this tab, there is a list of blank URLs.
For you, it’s sure that it’s totally BLANK then click ‘add new URL like…’ and add EXACTLY this URL :
http://mt4.thirdbrainfx.com/mx.php

5 Step 5:
You should have the same settings now . It means that you allow your MT4 to connect to our server. Without these settings, the robot won’t work.
After setting up your account, close the trading windows on your screen and pick an instrument (‘Symbol’ Section) to run the Expert Advisor with by selecting EURUSD chart and opening a new chart->
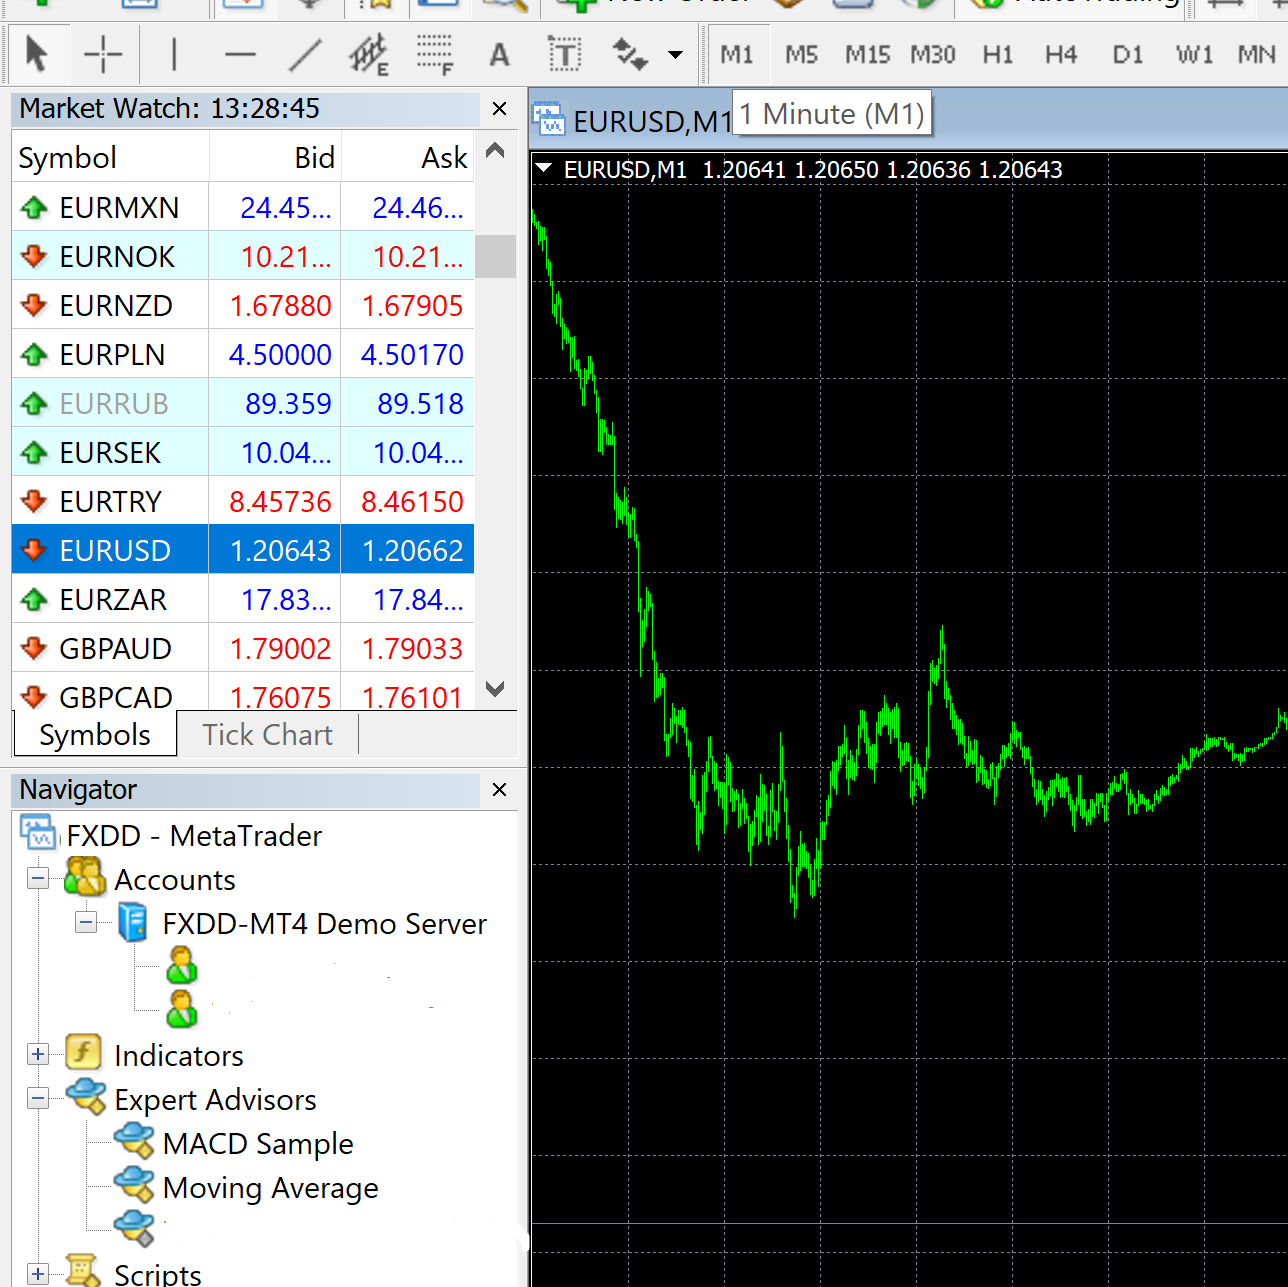
right click on the mouse -> ‘Chart Window’.
It will open you a window showing the linechart of the chosen trade. Then as it is shown, choose ‘M1’ for seeing live updates every minute.
6 Step 6:
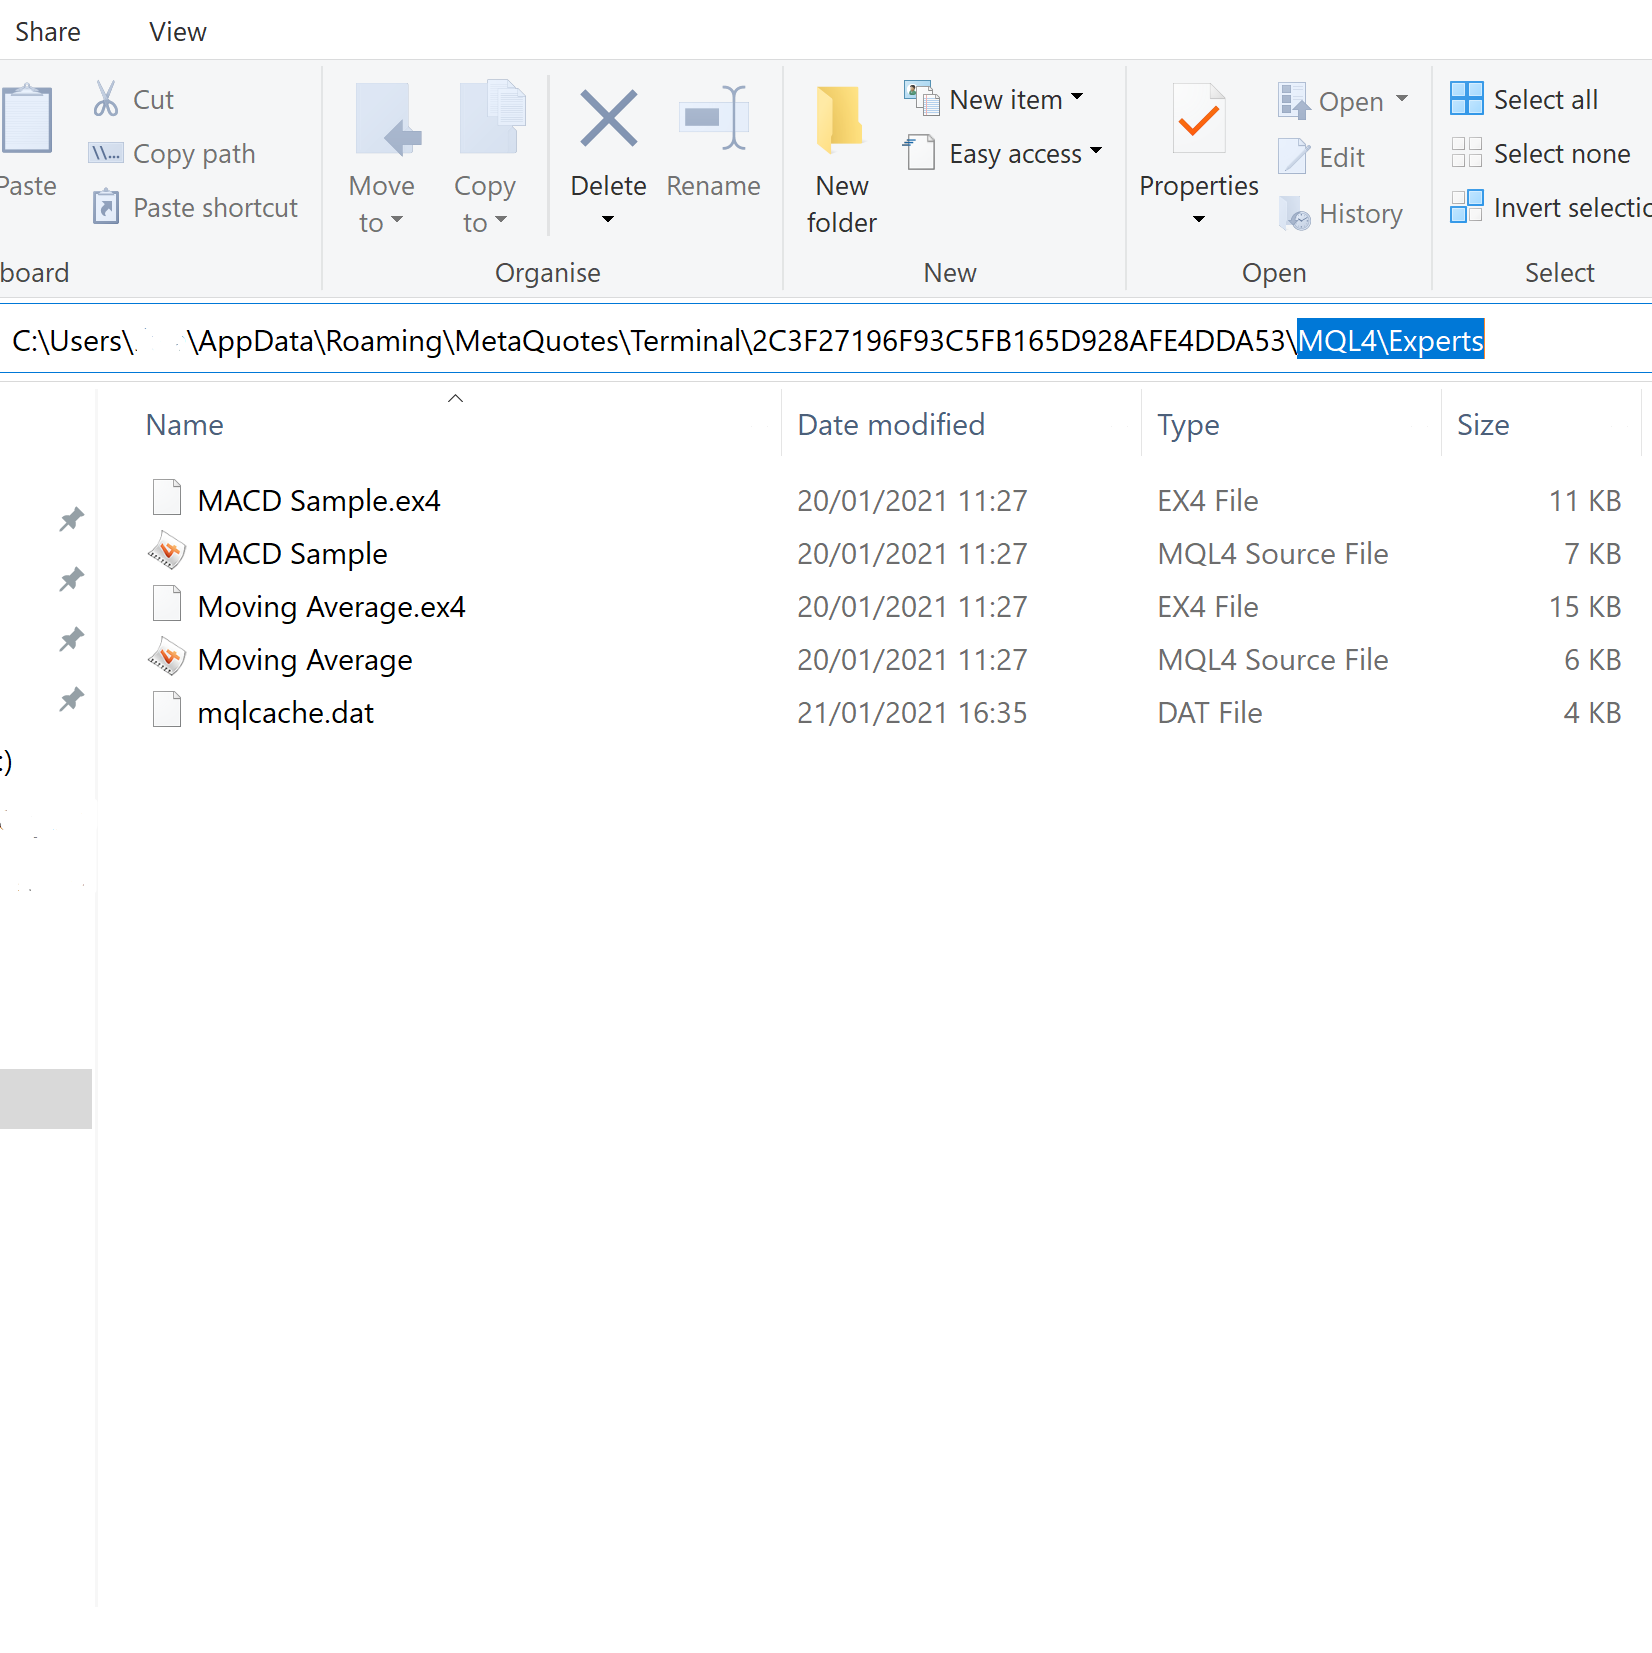
Then click on File-> Open Data folder.
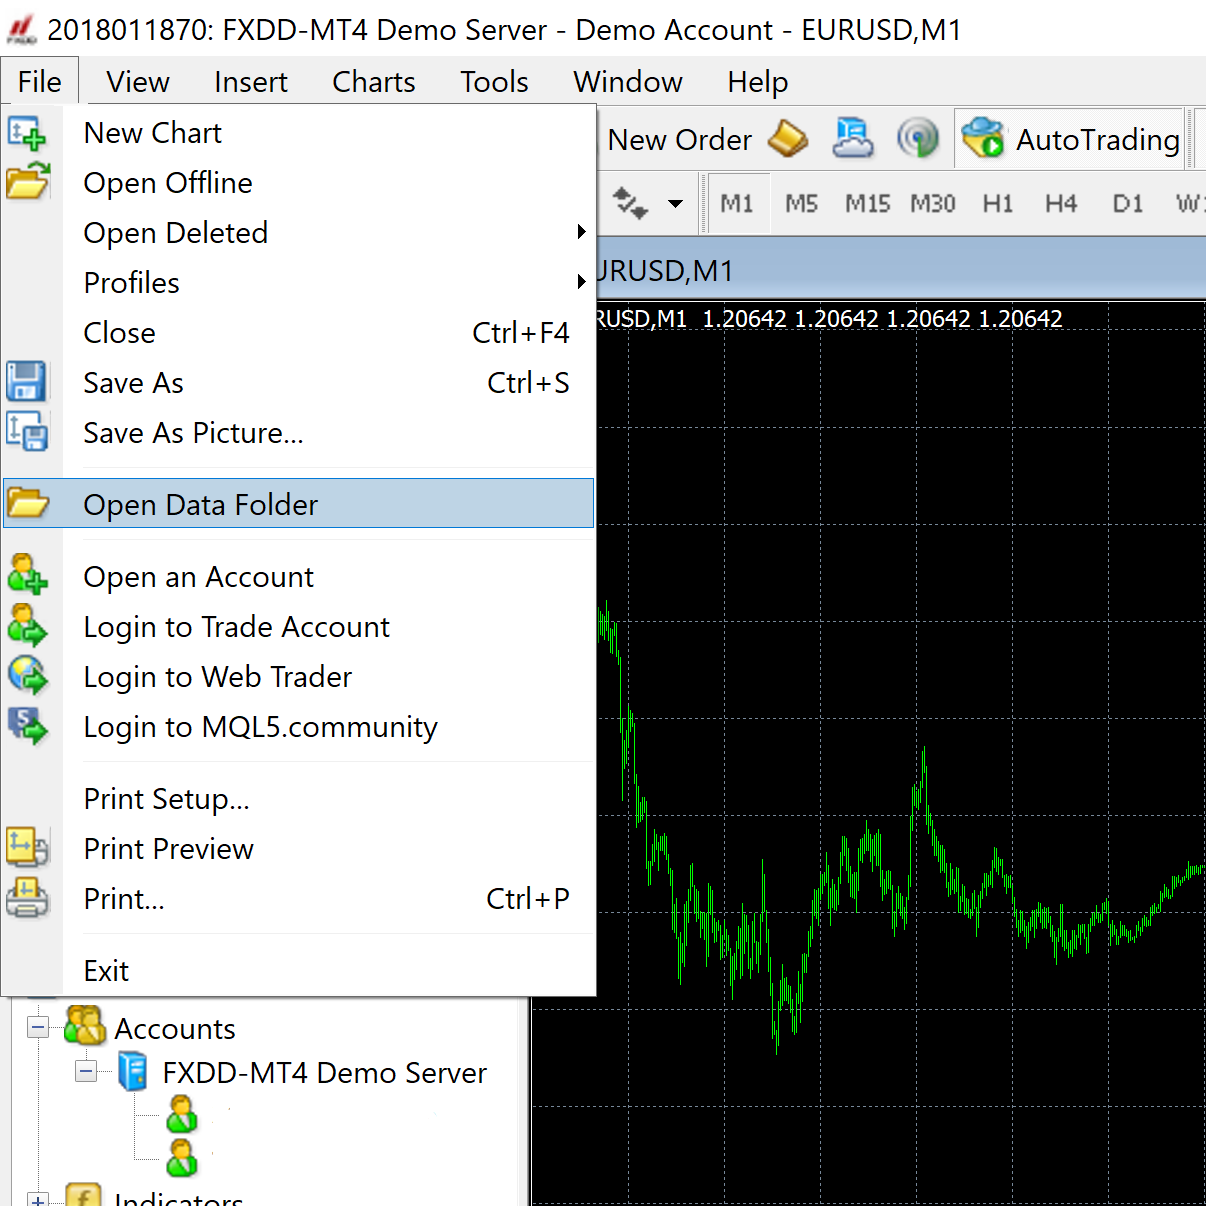
Go to the ‘MQL4’ folder, then choose the ‘Experts’ folder. Then, leave the folder open and go to Step 7 to continue.
7 Step 7:
Download the expert advisor from our website !
Find where you have saved the expert advisor you have downloaded from our website ( it should be in your ‘Downloads’ folder)
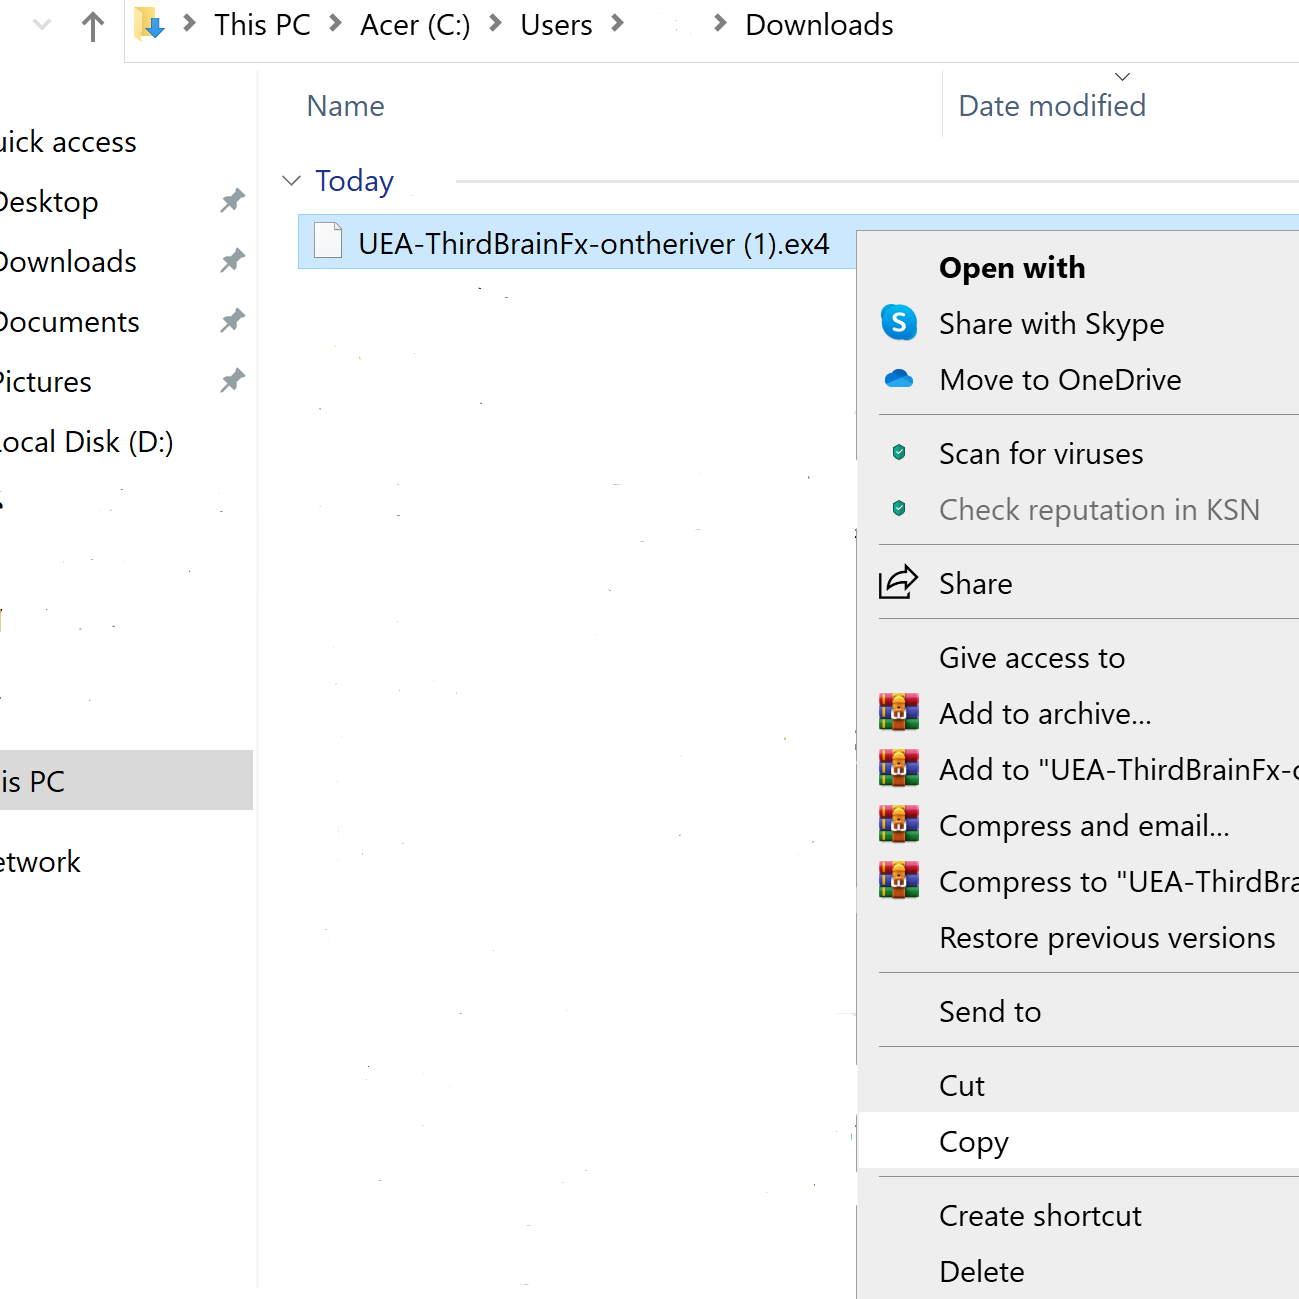
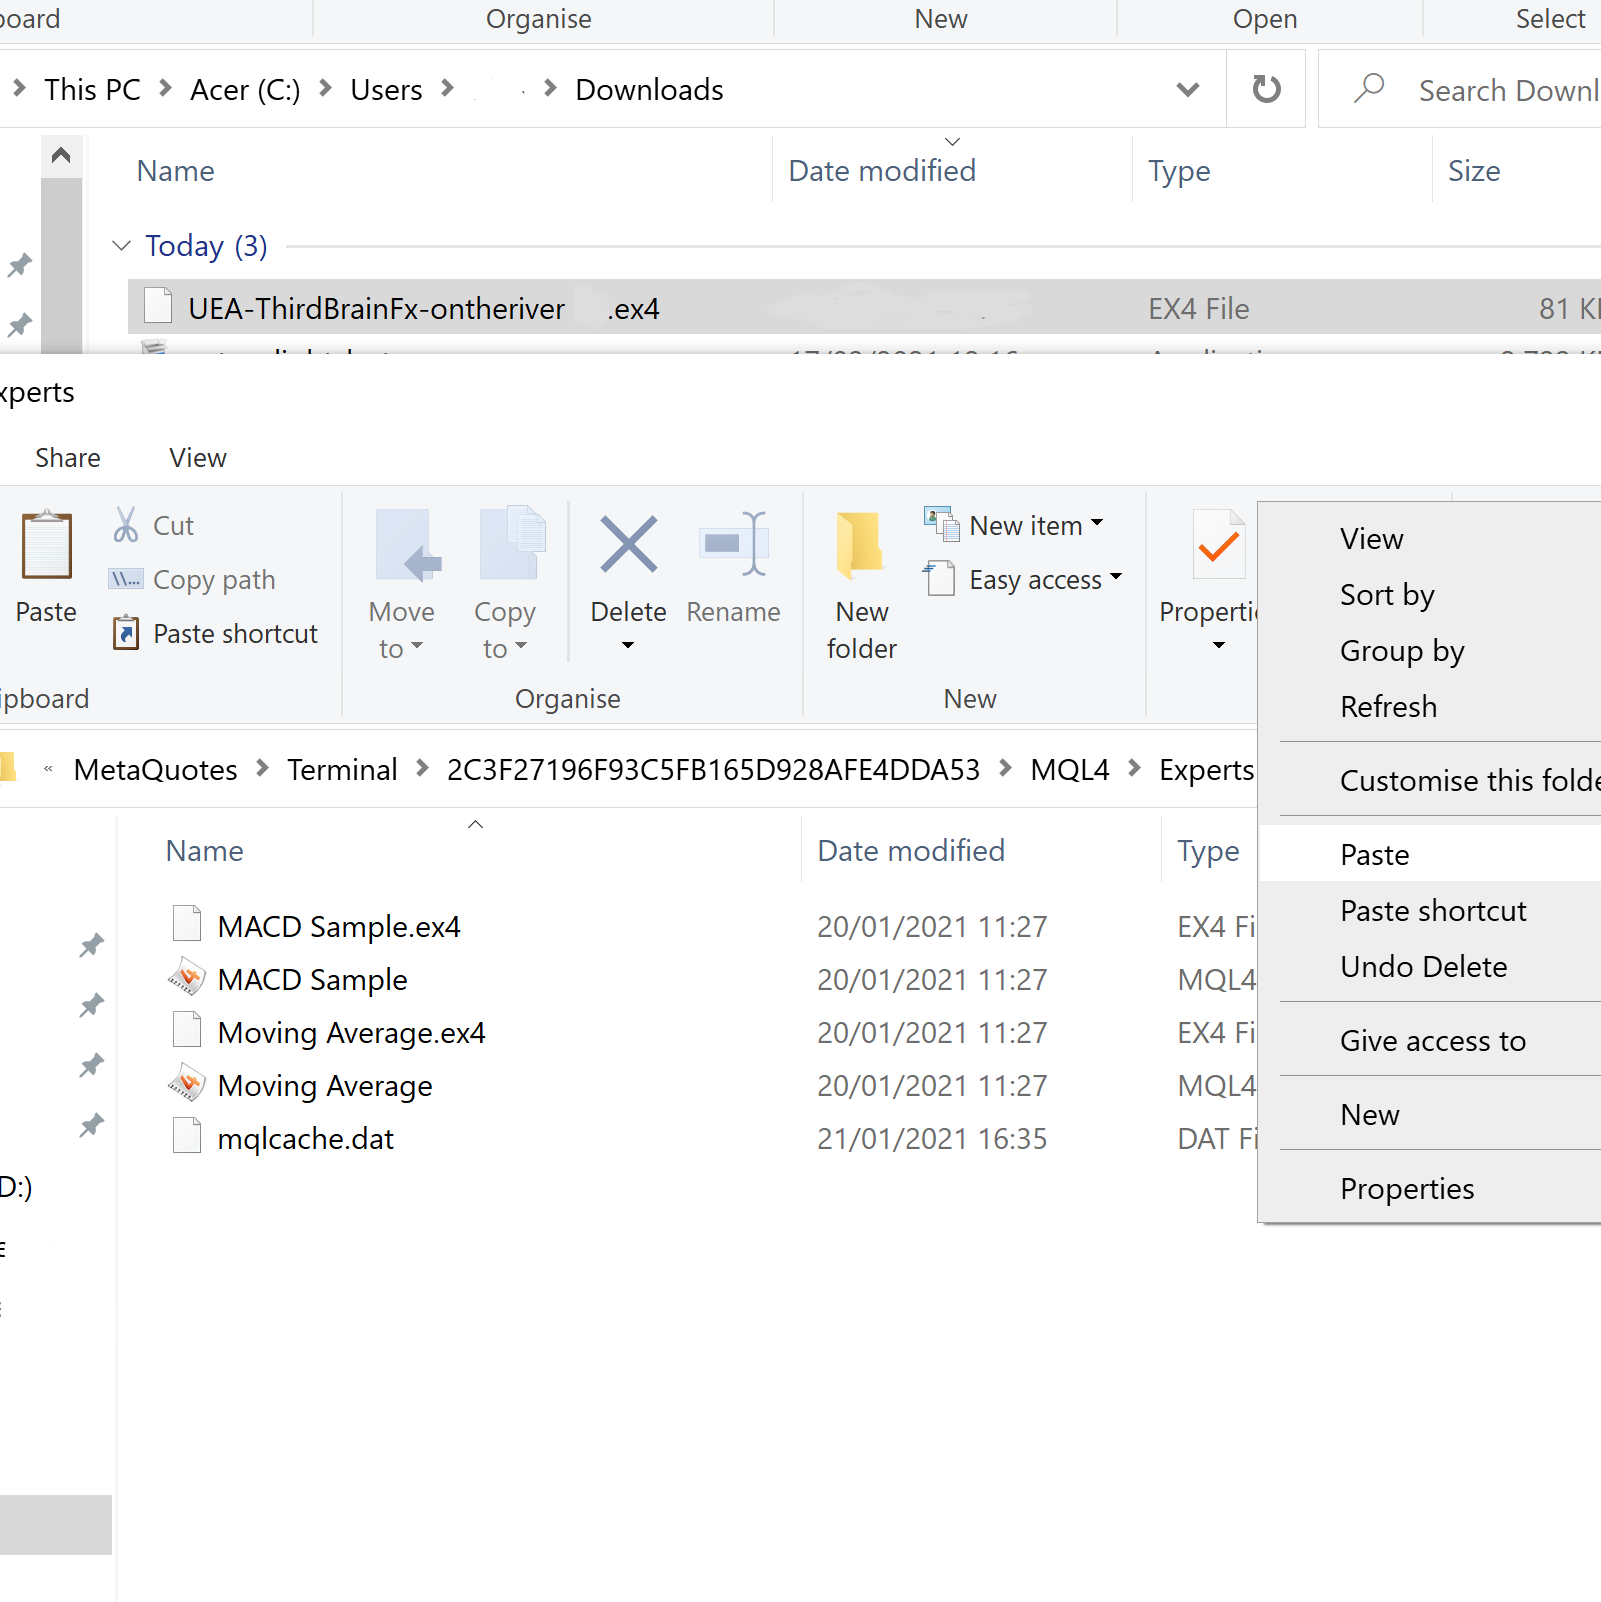
Right-click on your mouse, then 'Copy' the file and 'Paste' the file in the ‘Experts’ folder.
8 Step 8:
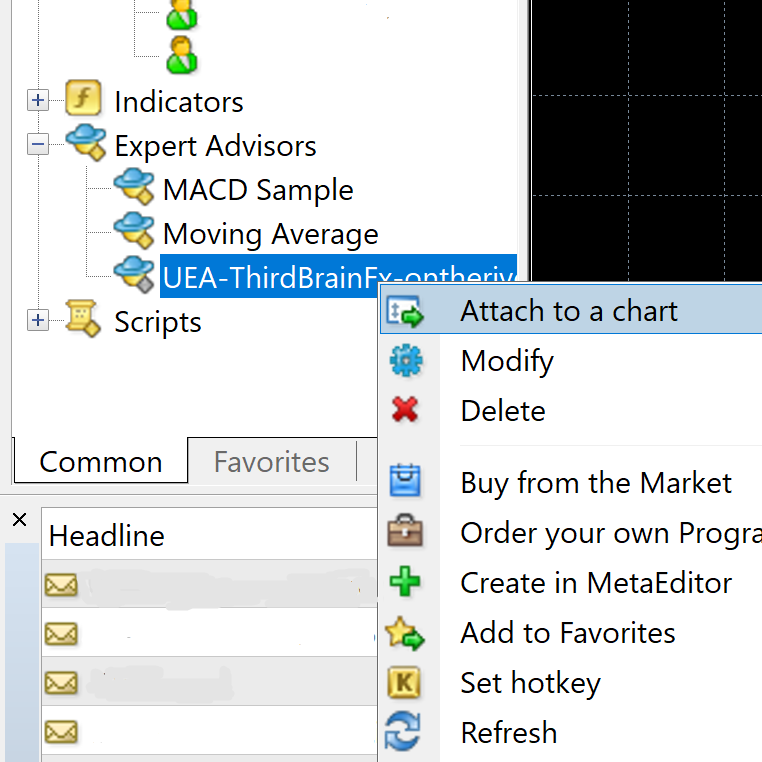
After finishing with these steps, open the program again and right-click on ‘Expert Advisors’, and choose ‘Refresh’.
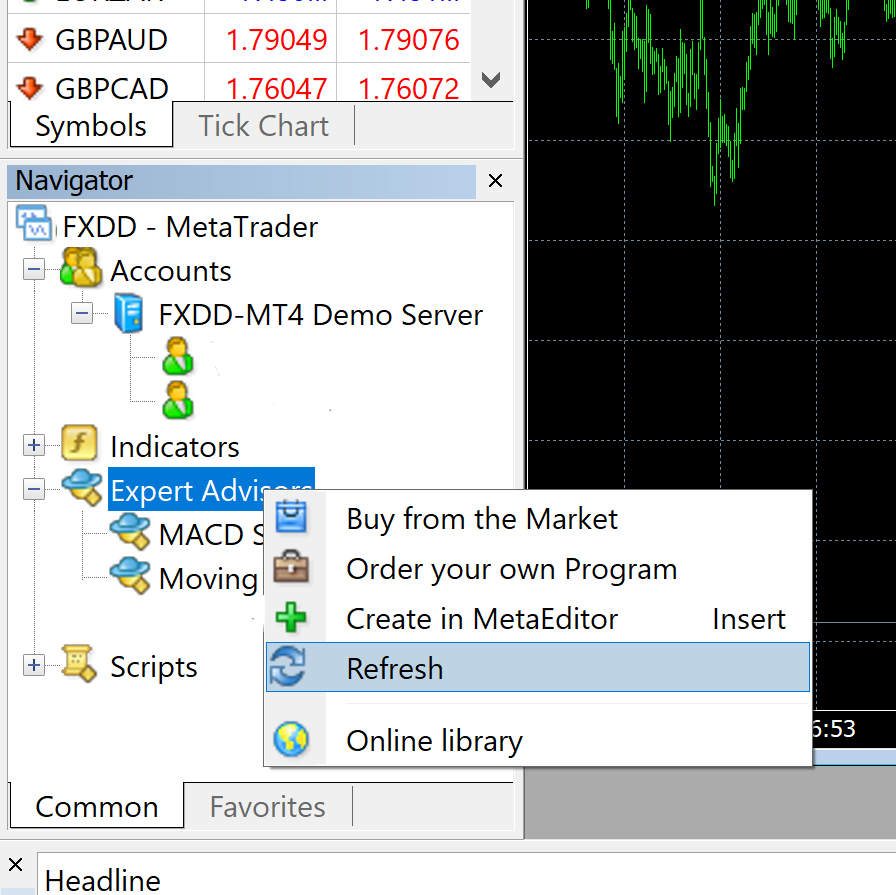
After refreshing the ‘Expert Advisors’, right-click on the new file that could be seen there. Click ‘Attach to a chart’ .
Pick the charts where you want your robot act. For example if you want OnTheRiver with GBPUSD . Open a GBPUSD chart and attach to this charts the robot
9 Step 9:
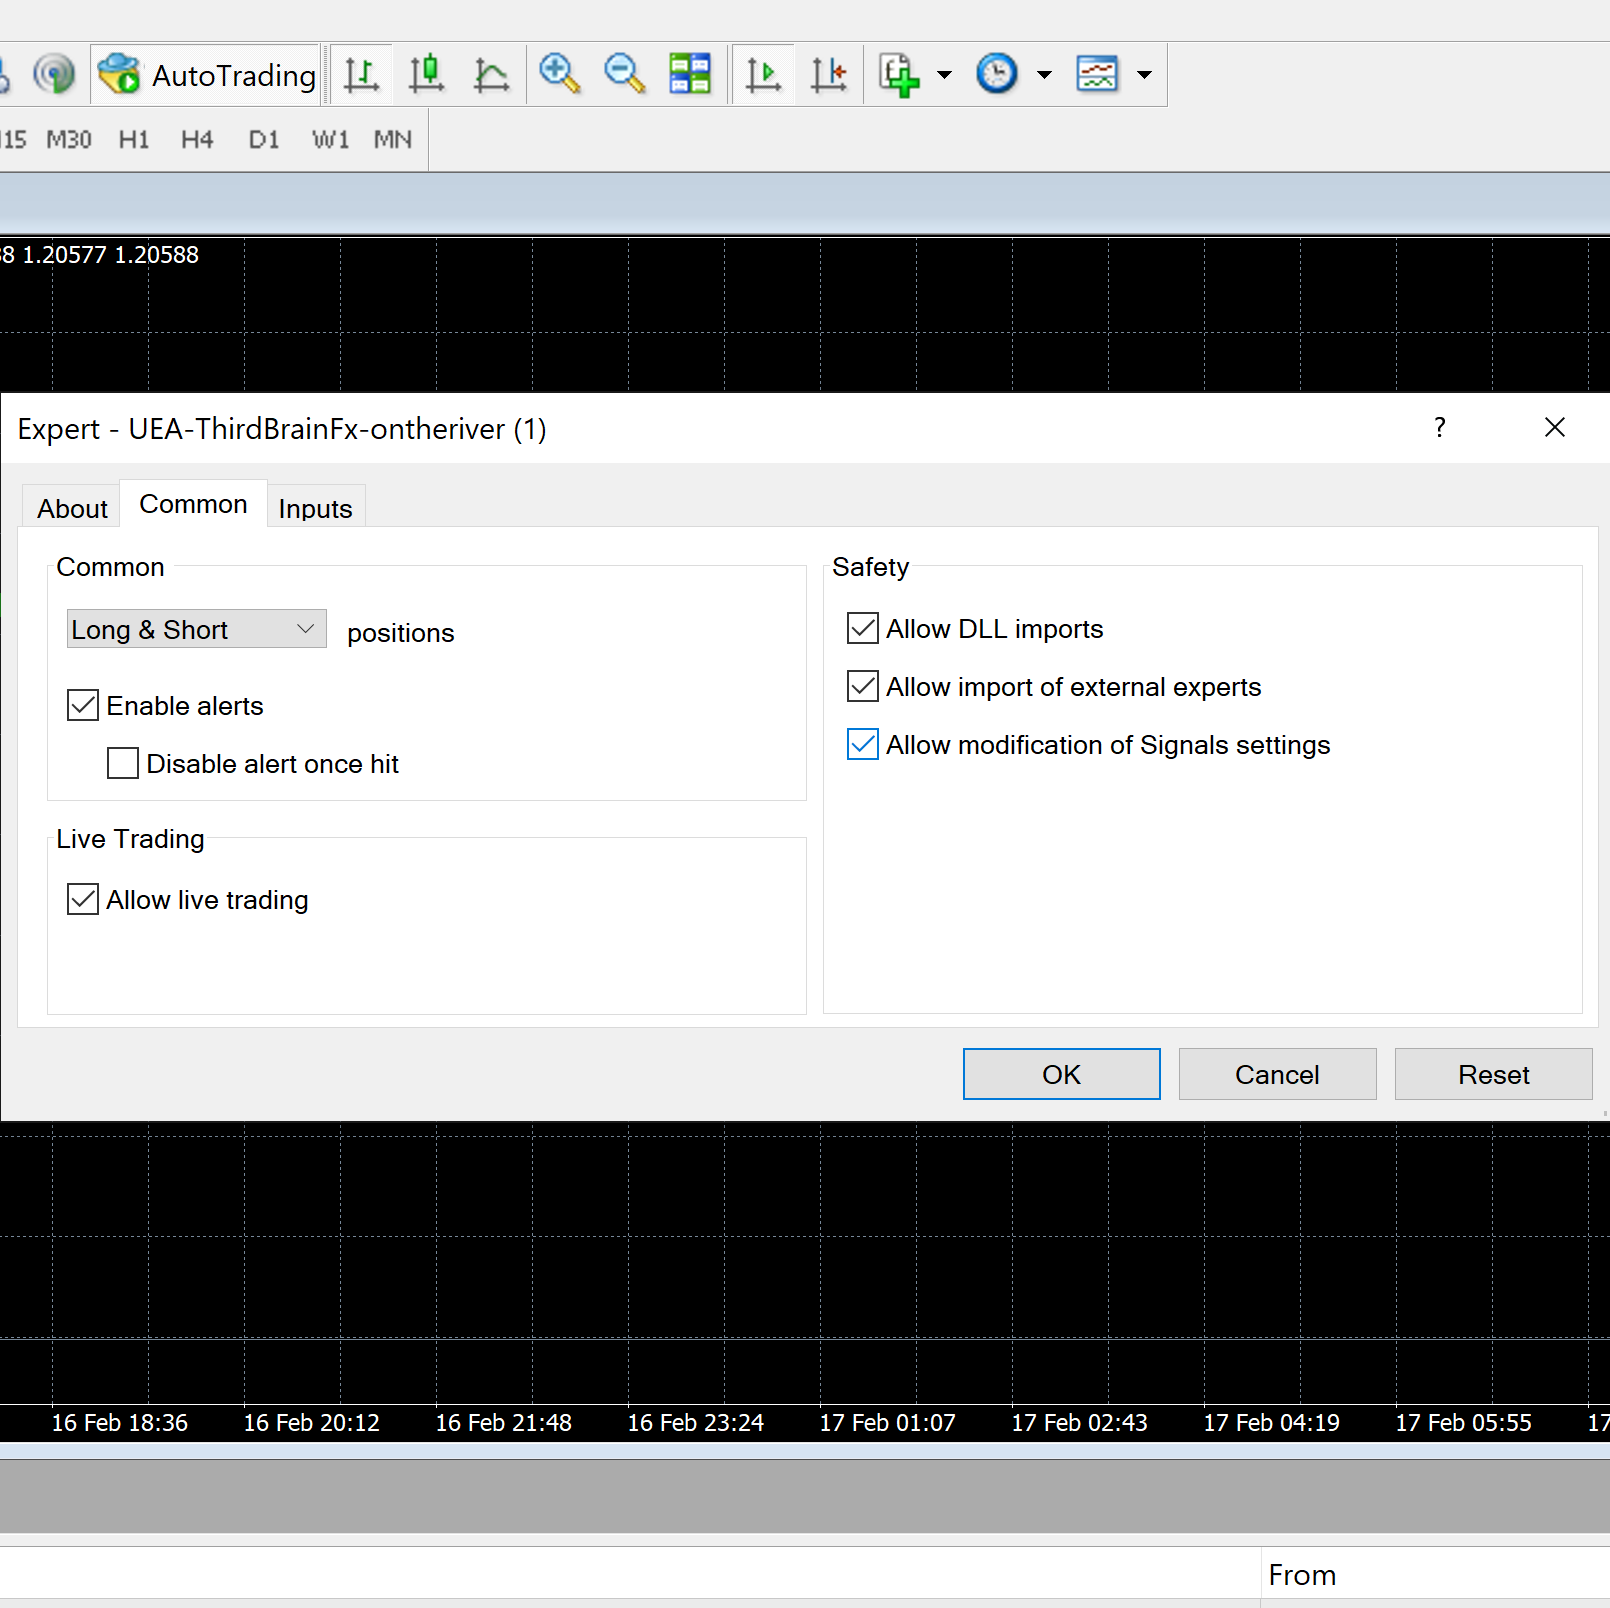
You will have a new window on your screen. Go to ‘Common’ and mark the boxes as it is shown.
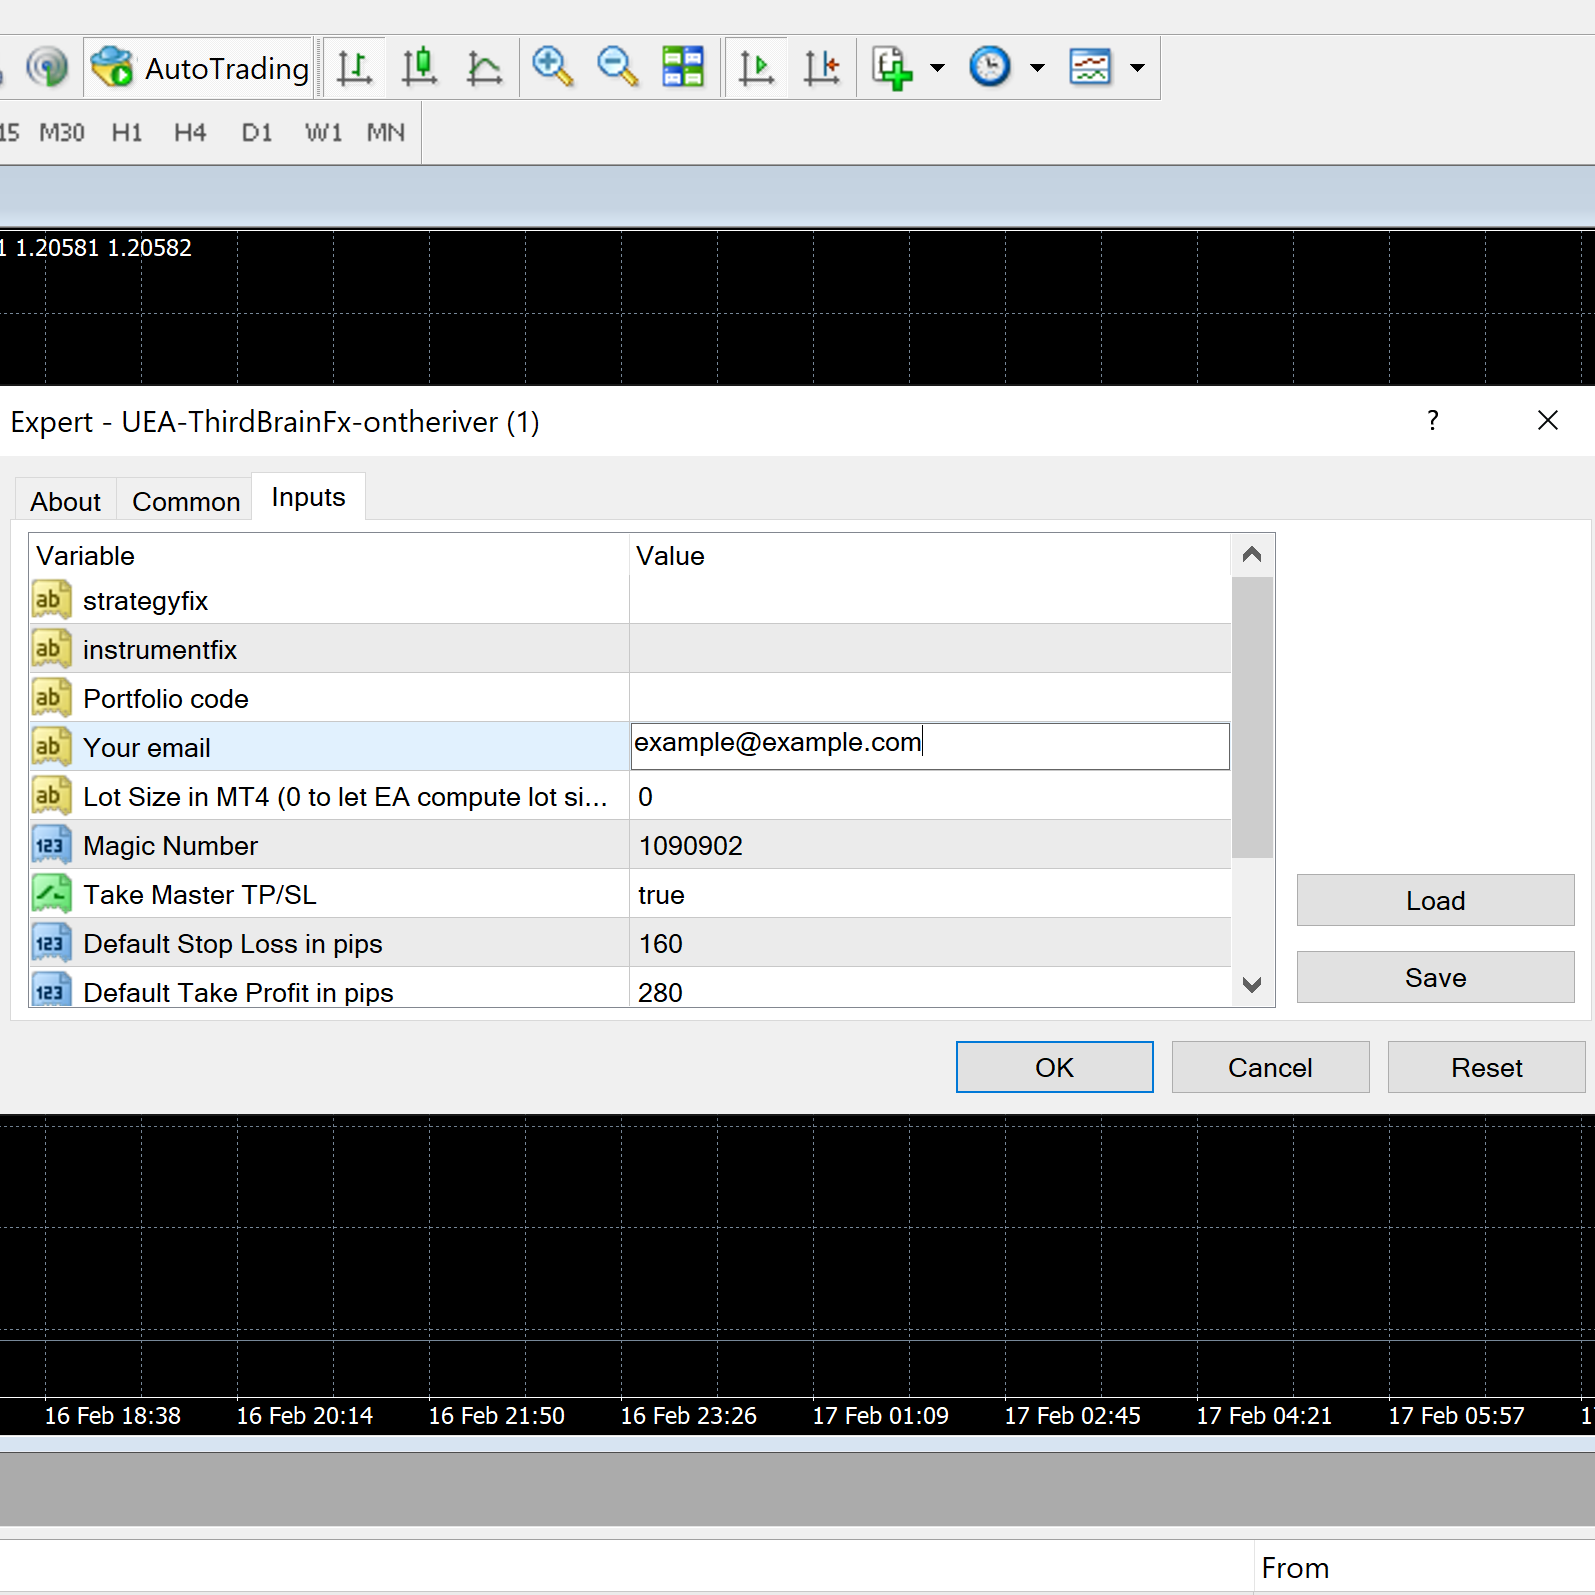
Go to ‘Inputs’ and insert the same email address you chose for your account, so the advisor works. Then, click ‘OK’.
Warning: Advisor will not work without inserting your email address!
10 Step 10:
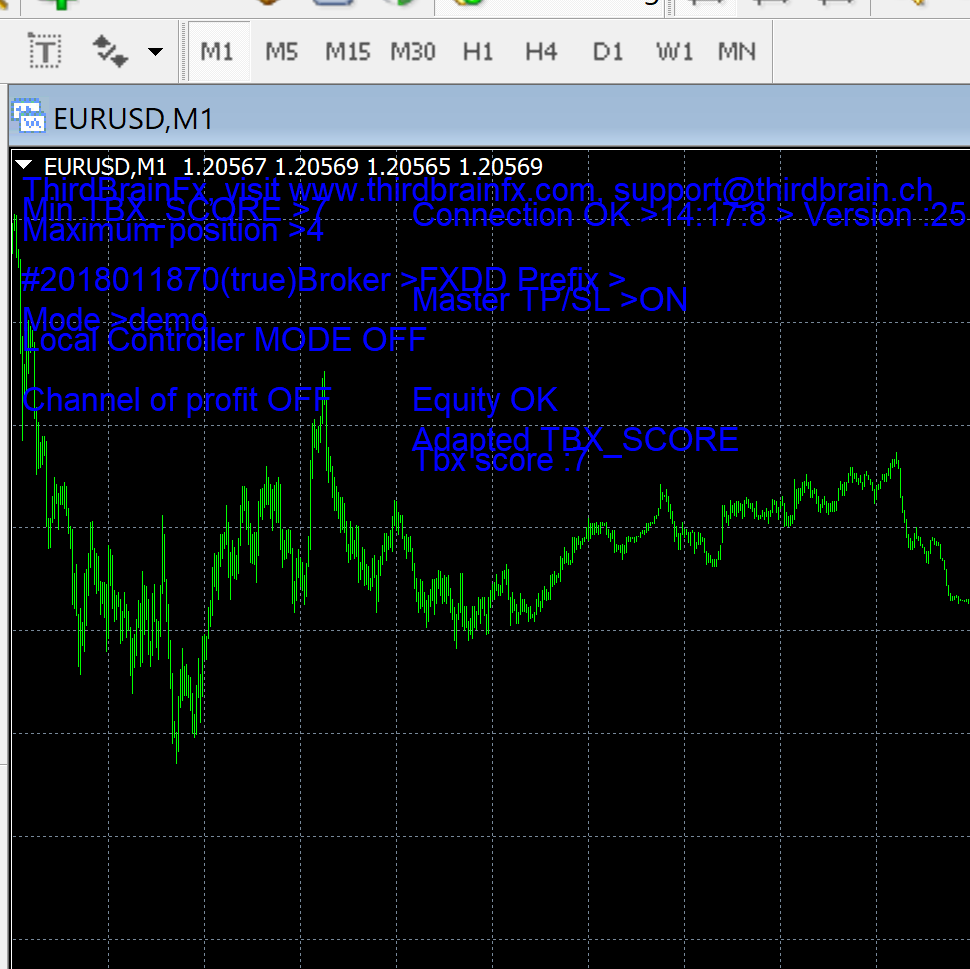
After closing the window you will see a blue message over the line chart. On the second row on the right column, if you see the message written ‘ Connection OK’, you can start your trading. Have fun!
Important! The connection is GOOD only when the blue message appears over the chart.
11 Important keys for your success!
1. The robot needs to run ALL the time from sunday midgnight GMT to Friday midnight GMT
2. You can trade manualy on top of the robot and the robot will automatically re-size the money is playing with depending on the exposition you are taking. It means if you are playing a lot manual, the robot will play less.
3 - We advice to test first the behavior of the robot in a demo account - just to let you the time to see what happen in your account. Let it run some weeks.
4 - When you are aware of the robot behavior, put a live account with the recommended amount of capital knowning the risk you are taking.
12 How to select one single pair 'ONLY' with the robots.
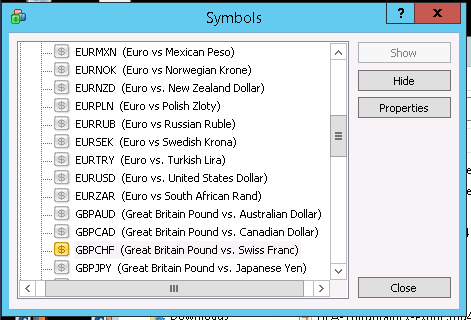
The recommended method to select a pair for example OnTheRiver with GBPCHF is to only display GBPCHF as instrument in your trading account. Select "Hide All" to go fast, then Symbols.
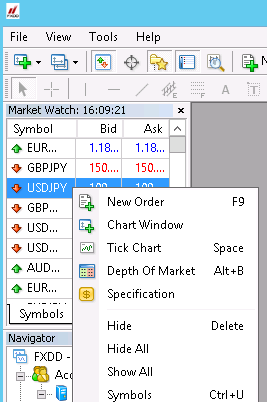
Then 'show GBPCHF' (in our examples). It's the best setting to be sure that only trades with GBPCHF will be played in your account and the "sure" way to do AND TO ATTACH THE EXPERT ADVISOR TO THIS PAIR.
Another other method is to enter in the settings of the expert-advisor the GBPCHF instrument in the instrumentfix field but we don't advice do that because you may forget to re-enter this settings if you move your EA....
13 MetaRobot – ThirdBrainFx- special setup
The metarobot - ThirdBrainFx needs to access to an another URL :
You need to setup the URL of access in the settings to
http://mt4.thirdbrainfx.com/receive-signal-nucleus.php
And not the other url given for all others robots.
Also this ROBOT needs only to put in EUR/USD M1 : you don't need to attach this robot to another instrument.